In this post we will share How To Map a Network Drive In Windows 10, 8, 7, Vista, XP/2000, Mac OS X. Microsoft Windows makes it generally simple to have multiple PCs on a similar network. It’s incredible to cooperate on a solitary task utilizing diverse PCs, or just to share data. In any case, aside from the standard network document sharing feature, Windows likewise accompanies the capacity to outline the network shared folders as a consistent Windows Drive.
Mapping the drive influences the shared folder to seem similarly as though it was a physical drive, and activities performed are handled recently like they are prepared on a physical drive (with a couple of exemptions), which is helpful for applications that expect a physical drive.
In this instructional article, we will demonstrate to you how you can map a drive and how it is superior to just sharing data over the network.
Why Map a Network Drive?
At the point when a shared folder is mapped as a drive, a drive letter (like D:) is allocated to it and it turns into an intelligent drive, which has all (however not every one of) the functionalities of a sensible drive sponsored by a physical circle/SSD.
At the point when a folder is shared over a network, it is dealt with like a common folder by the system and the applications, and you are required to enter the Uniform Naming Convention (UNC) name or browse the folder each time you have to get to it.
The most widely recognized (however not the most imperative) motivation to map a drive is to get to it effectively. You can without much of a stretch access the mutual folder/drive appropriate from Windows explorer, else, you would need to locate the shared folder by browsing or utilizing UNC name each time.
Be that as it may, there are some other mandatory reasons also. A few applications may specifically work with a physical drive, so you may map folder as a drive in your PC to influence them to work. Besides, a few applications additionally don’t function admirably with UNC names or don’t work by any means, so you have to delineate folder as a drive.
How To Map a Network Drive?
Technique 1: How to Map a Network Drive in Windows 10
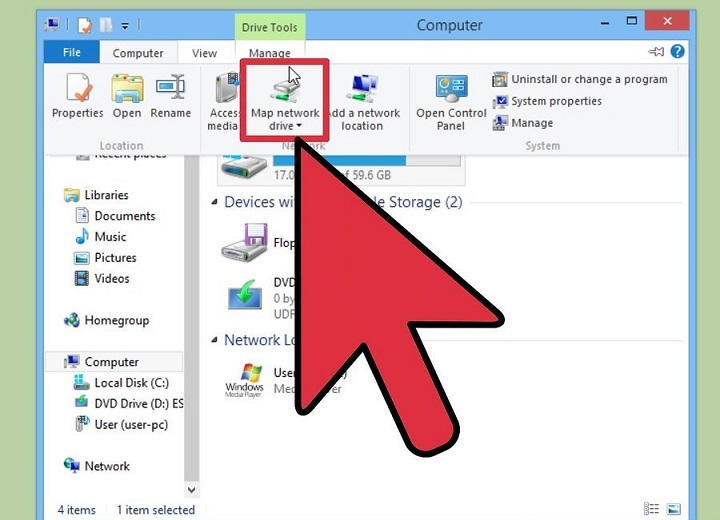
- Open File Explorer and select This PC.
- Tap the Map network drive button in the strip menu at the best, at that point select “Map network drive.” (This is under the Computer tab, which should open naturally when you go to This PC, as above.)
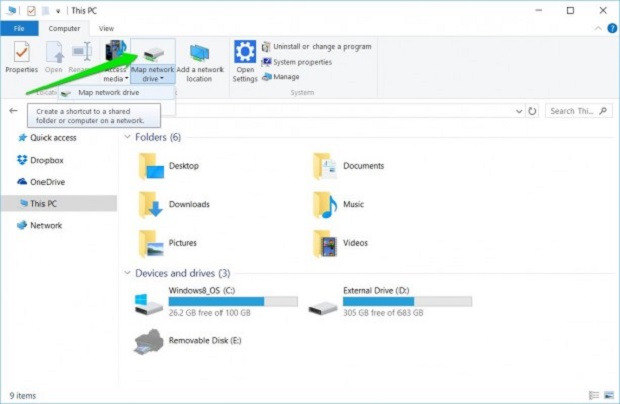
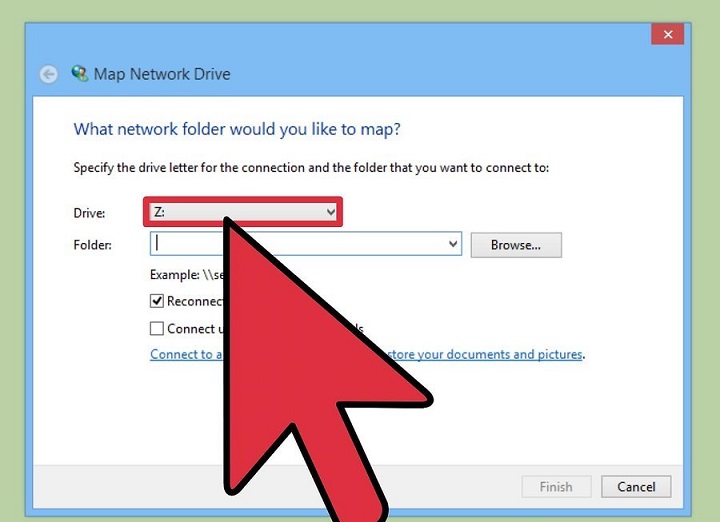
- Select the drive letter you need to use for the network folder, at that point hit Browse.

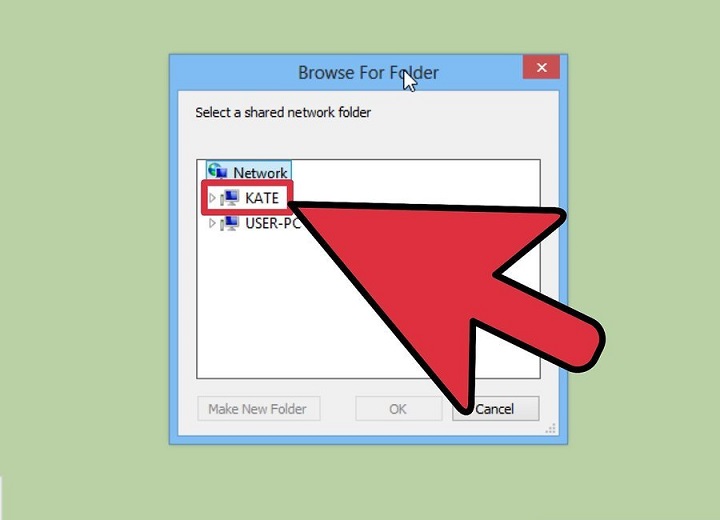
- Explore to the folder you need to guide and hit OK subsequent to selecting it.
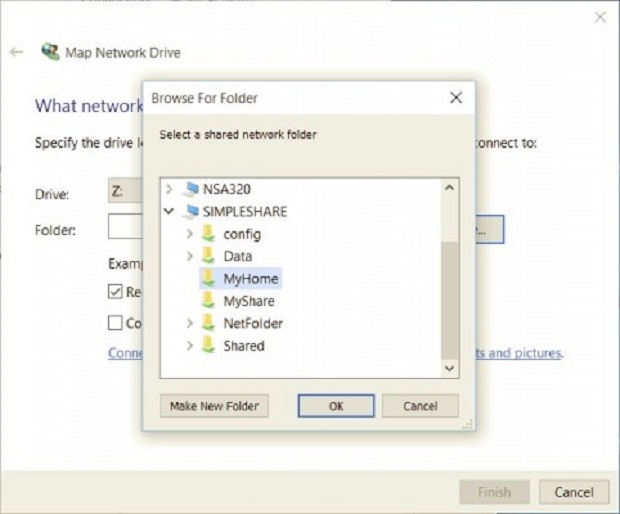
- Confirm your selection and click on Finish. You can decide to reconnect to the folder each time you sign in so it’s constantly accessible to you and, if necessary, utilize a different user account to associate with the folder.
When you’re set, you should see the new drive letter under This PC and will have the capacity to get to its substance like you would some other folder. In the event that you need to detach the network drive, right-tap on it and select “Disconnect.”
Technique 2: How to Map a Network Drive in Windows Vista/7/8
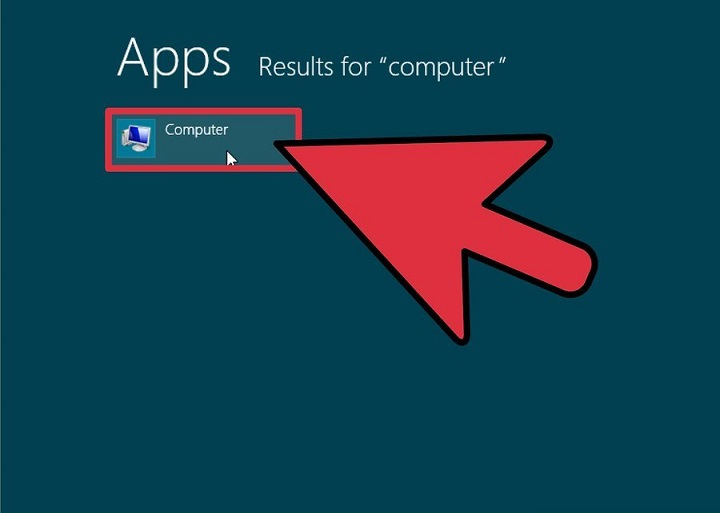
- Open Computer to show your connected drives. Tap the Start menu and after that snap Computer. This will open a window showing the greater part of your drives. To open Computer in Windows 8, sort “computer” while on the Start screen and snap Computer in the indexed lists.
- Click on Map Network Drive. This button is situated on the correct end of the best even menu bar. Clicking this button will open the Map Network Drive window.
In Windows 8, tap the Computer tab, and then select Map Network Drive.
- Select a drive letter. This is the letter that will show up on the network to identify the drive. Pick a letter towards the finish of the letter set to abstain from clashing with existing physical drives.
- Pick the folder that you need to connect with. You can either sort in the area into the field by entering \\computername\path\to\folder\, or you can click Browse… and explore to the folder that you need to map a drive.
Your folder must be set to have partaken with a specific end goal to map as a network drive. Keeping in mind the end goal to do this, right-tap the folder you need and select Properties from the menu. Tap the Sharing tab and after that snap Advanced Sharing… In the window that opens, select “Share this folder” and hit OK.
In the event that you are connecting with a mutual folder on a network that is not on your PC, you may need to give login data. Check the container marked “Connect using different credentials” and enter your login data. Check with your network head in the event that you don’t have the foggiest idea about the username and secret key.
How To Copy and Paste (Win, Mac, iPhone, iPad, Android)
Technique 3: How to Mapp a Network Drive in Mac OS X
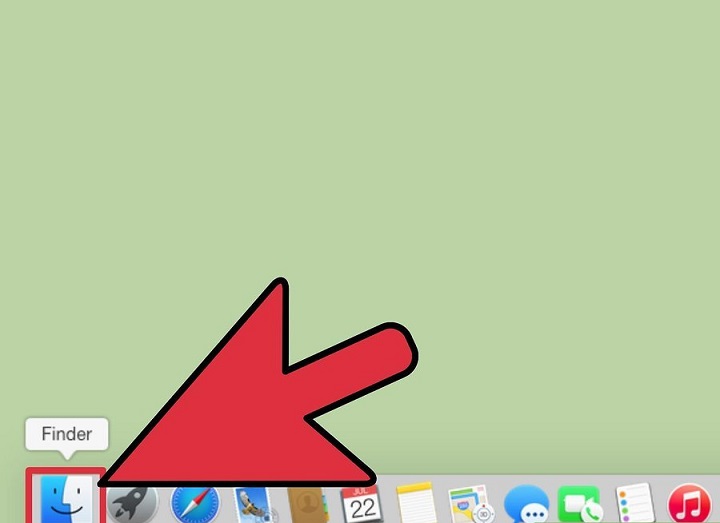
- Open the Finder. The Finder is ordinarily situated in the Dock. Press Command+K to open the Connect to Server window. Enter the location of the common drive that you need to map. Enter the area in the accompanying configuration:/computername/way/to/folder. Click on Connect
The folder must be shared with a specific end goal to map as a network drive.
You may need to enter login details if the folder has been secured.
- Set the drive to remount upon reboot. On the off chance that you abandon it as it seems to be, the drive won’t be remounted next time you reboot or reconnect to the network. You should add it to your Login Items for it to return.
- Click on the Apple menu. Select System Preferences, at that point, click Accounts. Open Login Items, at that point tap on the “+” button to include the network drive. Find the drive and snap Add.

Quite possibly your drive won’t appear on the desktop. To settle this, open the Finder and afterward open the Finder inclinations by squeezing Command+. Select the General tab and check the case for Connected Servers. Your drive should now show up on your desktop.
How To Charge Your Phone Faster?
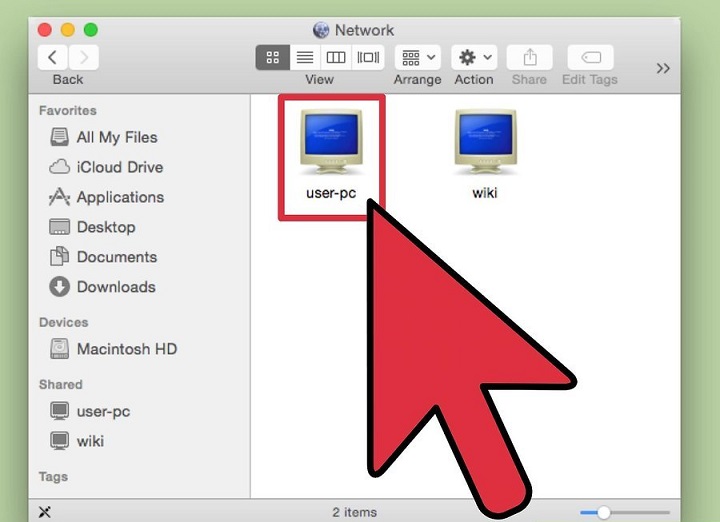
Technique 4: How to Map a Network Drive in Windows XP/2000
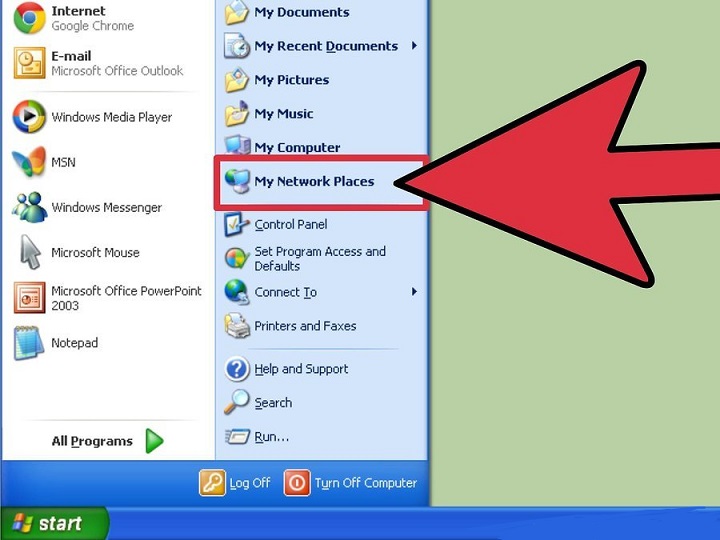
- Open My Network Places. Click on the Start button and select My Network Places. Click on “Entire Network” in the Other Places menu in the left navigation frame. Select the network domain or workgroup that contains the PC’s shared documents you need to browse.
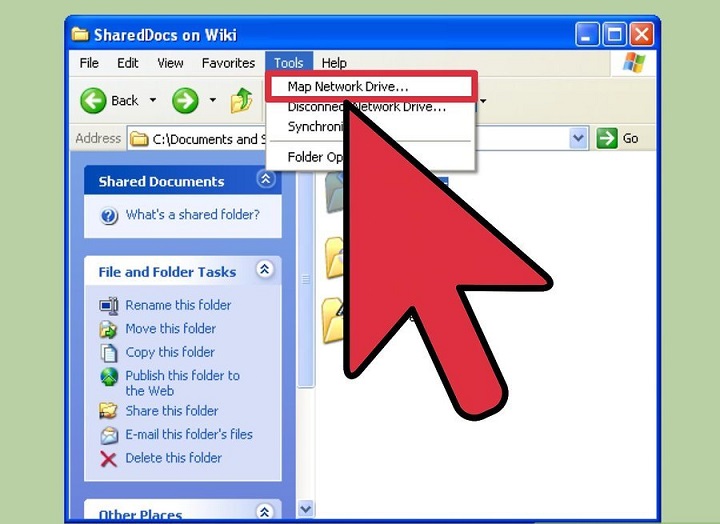
- Open the Map Network Drive window. Right-tap the network folder you need to map choose Map Network Drive from the menu. This will open the Map Network Drive dialog box.
- Select a drive letter. Select a letter from the Drive list, and check the “Reconnect at logon” box if you need to the drive to appear each time you reboot or reconnect to the network. Click on Finish.
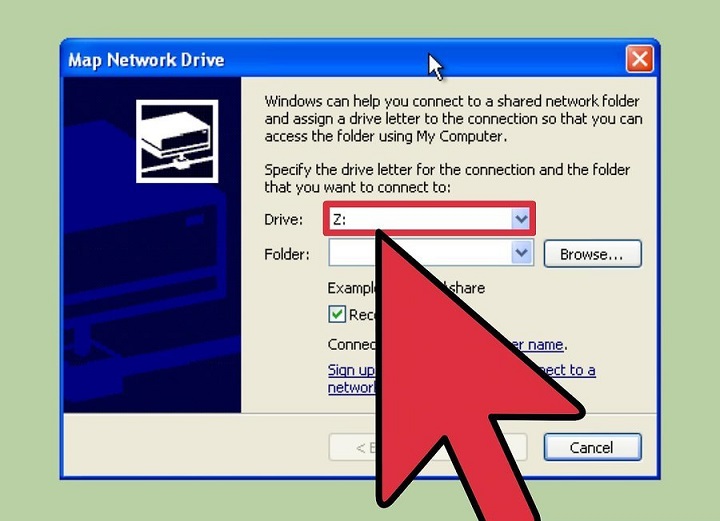
Pick a letter towards the finish of the letters in order to stay away from clashes with existing drives.
If you are connecting with an ensured folder, you may need to login to get to it. Keeping in mind the end goal to do as such, tap the “Connect with a different user name” link, and after that enter the username and secret key. If you don’t have the foggiest idea about your login data, check with your network administrator.